


There’s a lot of noise around agents and it gets confusing fast: Claude Code, Codex, OpenClaw, Hermes, Cowork, RAG, MCP. New tools and terms seem to appear every week.
It’s easy to feel overwhelmed and not know where to start. I spent some time figuring out what everything does, how the pieces fit together, and how to build a custom agent of my own. I can promise you, it’s not as complicated as it first appears.
To prove it, I built a travel-planning agent. I give it a destination, a budget, and my travel dates, and it gives me back a day-by-day itinerary with real prices, recommendations and map links pulled together from Google Maps, TripAdvisor, YouTube, and tourism websites.
Here’s exactly how I built it, step by step.
What is an Agent?
OpenAI has the clearest definition I’ve found:
An agent is a system that independently accomplishes tasks on your behalf.
An agent can take a task and work through the steps needed to complete it. It can decide what to do next, use tools, look at the result, and continue until the job is done.
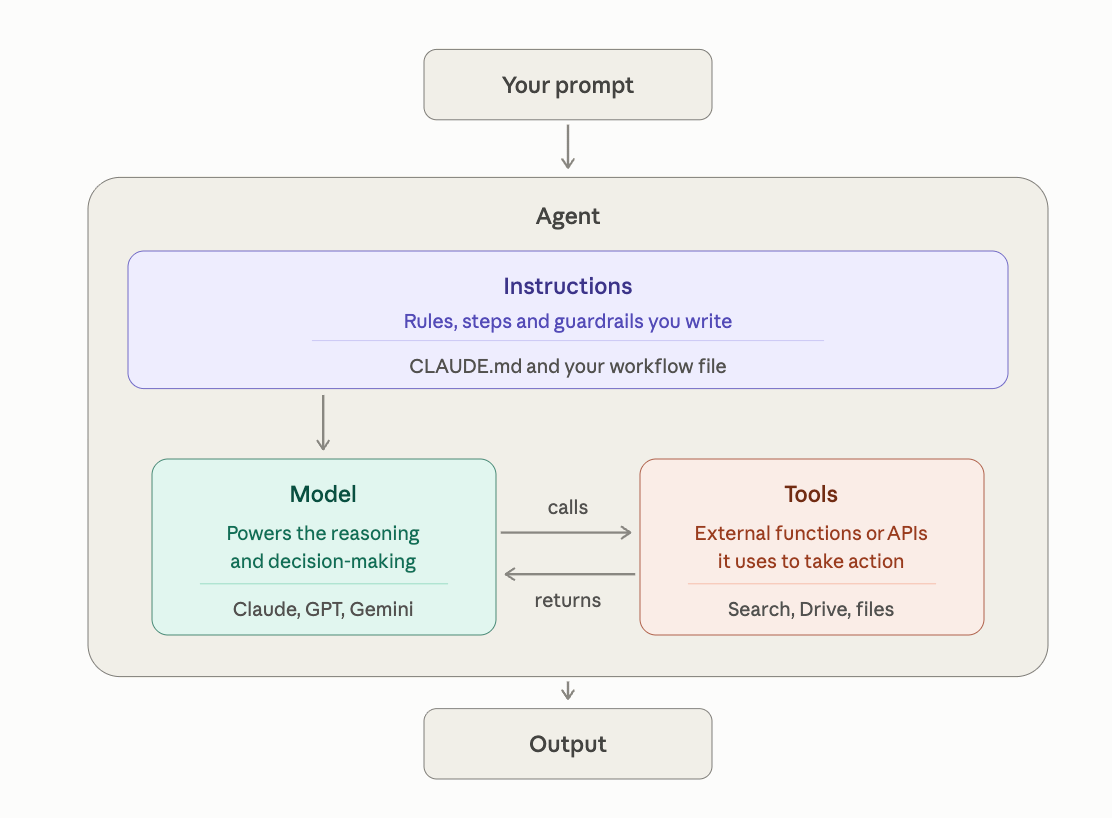
Underneath, there are three parts.
Instructions are the rules and workflow you write. This is the only part you actually make, and it’s where nearly all your time goes.
The model is the LLM doing the thinking. Claude, GPT, Gemini.
Tools are how it reaches outside itself. Web search, your files, Google Drive.
The agent keeps going until the task is complete.
For example, if you ask an agent to research a trip, it might search for flights, compare hotels, check restaurant reviews, and put everything into an itinerary. You give it the goal; the agent figures out how to get there.
First: Decide which tools to use
Not every task needs a custom agent. There is plenty of overlap here and the boundaries will keep blurring as the tools evolve, but in broad strokes you have two choices:
1. Configure an existing tool
Tools such as Claude Cowork, Hermes Agent, OpenClaw, Zapier Agents, Gumloop and n8n already provide the basic system. Some work like ready-made assistants. Others let you connect apps and arrange the steps yourself. You can use them to review emails, create reports, process files, run scheduled routines or update a CRM.
The amount of setup varies, but you are starting with a system that already exists.
2. Build your own custom agent
Use Claude Code or Codex when you need to create the system yourself and the task is more complex. This gives you more control over the steps, rules, workflows, data sources, interface, and behavior.
An agent like this might check whether a sales lead meets your requirements before anyone contacts them, research a topic and stop if the evidence is weak, or review an invoice, flag what is missing, and request approval above a certain amount. In each case, the agent needs to know not just what to do, but when to stop, check, or ask for approval.
The agent I created is a travel planner. I give it a destination, my dates, and a budget, and it researches the trip across Google Maps, TripAdvisor, YouTube, and local tourism sites. It checks things like ratings, opening hours, travel times, and current prices, then pulls everything together into a day-by-day itinerary with suggested areas to stay, restaurants, attractions, and activities.
I mostly used Claude Code. Many of the tools above ultimately rely on the same underlying models—Claude, GPT, or Gemini—so I preferred working closer to the model itself. Claude Code gave me more control over the instructions, context, tools, and workflow, instead of having another product layer decide how the model should behave.
The rest of this post is about how I built it. You can follow the same steps for whatever agent you actually need.
Step 1: Install Claude Code
Check Step 1 in my previous blog post about how to create an app and publish it.
One thing to know up front: Claude Code requires a paid Claude plan. It isn’t included in the free plan.
Step 2: Install VS Code
VS Code is a free code editor from Microsoft. You can build your agent straight from the terminal if you want (on a Mac, hit Cmd+Space, type Terminal, press enter), but VS Code has a much nicer interface and shows you every file the agent writes.
Download VS Code from https://code.visualstudio.com/download and download the Mac version. Install and open it.
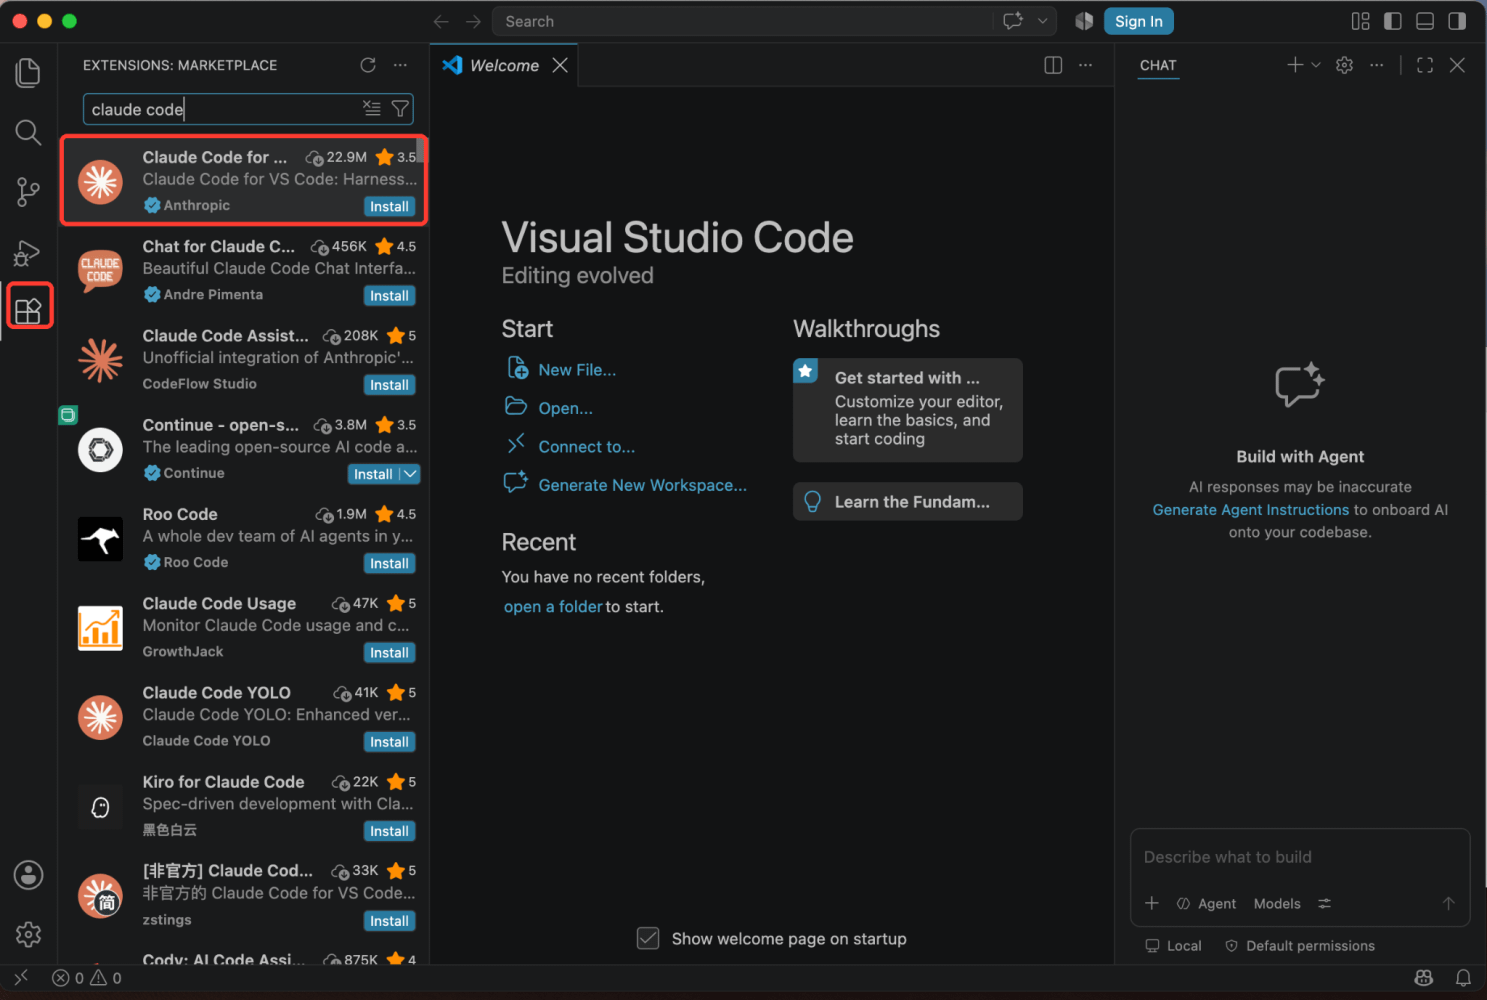
Once opened, go to Extensions in the left sidebar, search for “Claude Code,” install it, and sign in.
Step 3: Set up the project and write your CLAUDE.md
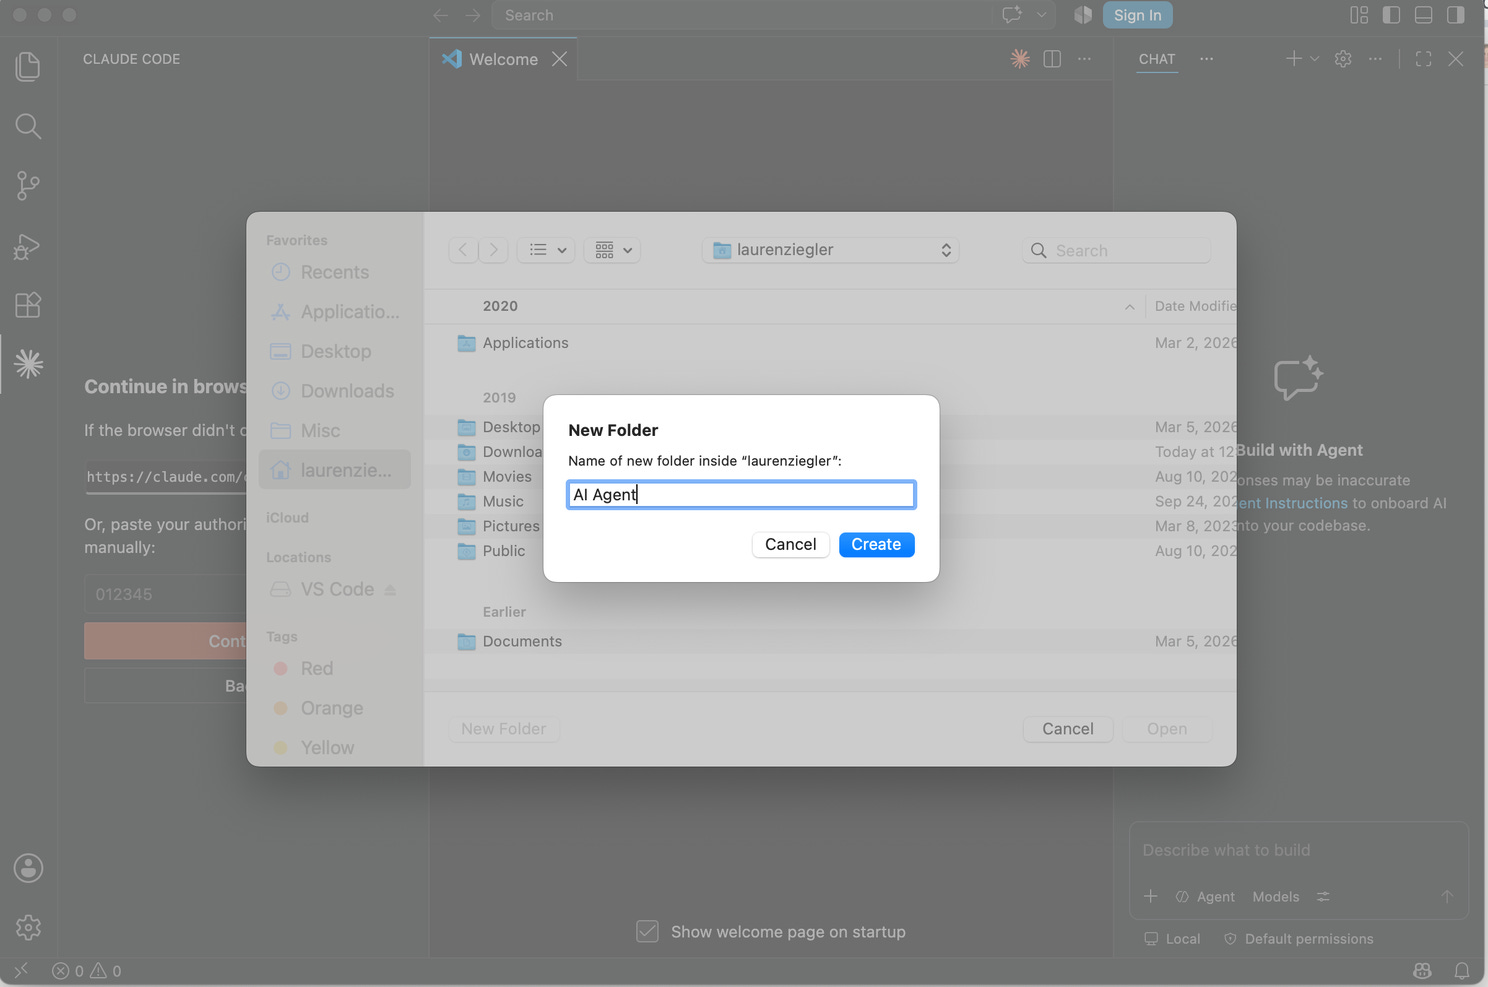
In VS Code, go to File → Open Folder and create a New Folder for the project. I called mine AI Agent.
Inside that folder, click the new-file icon at the top of the Explorer and name the file CLAUDE.md. The name matters—this is the file Claude Code looks for when it starts working on a project.
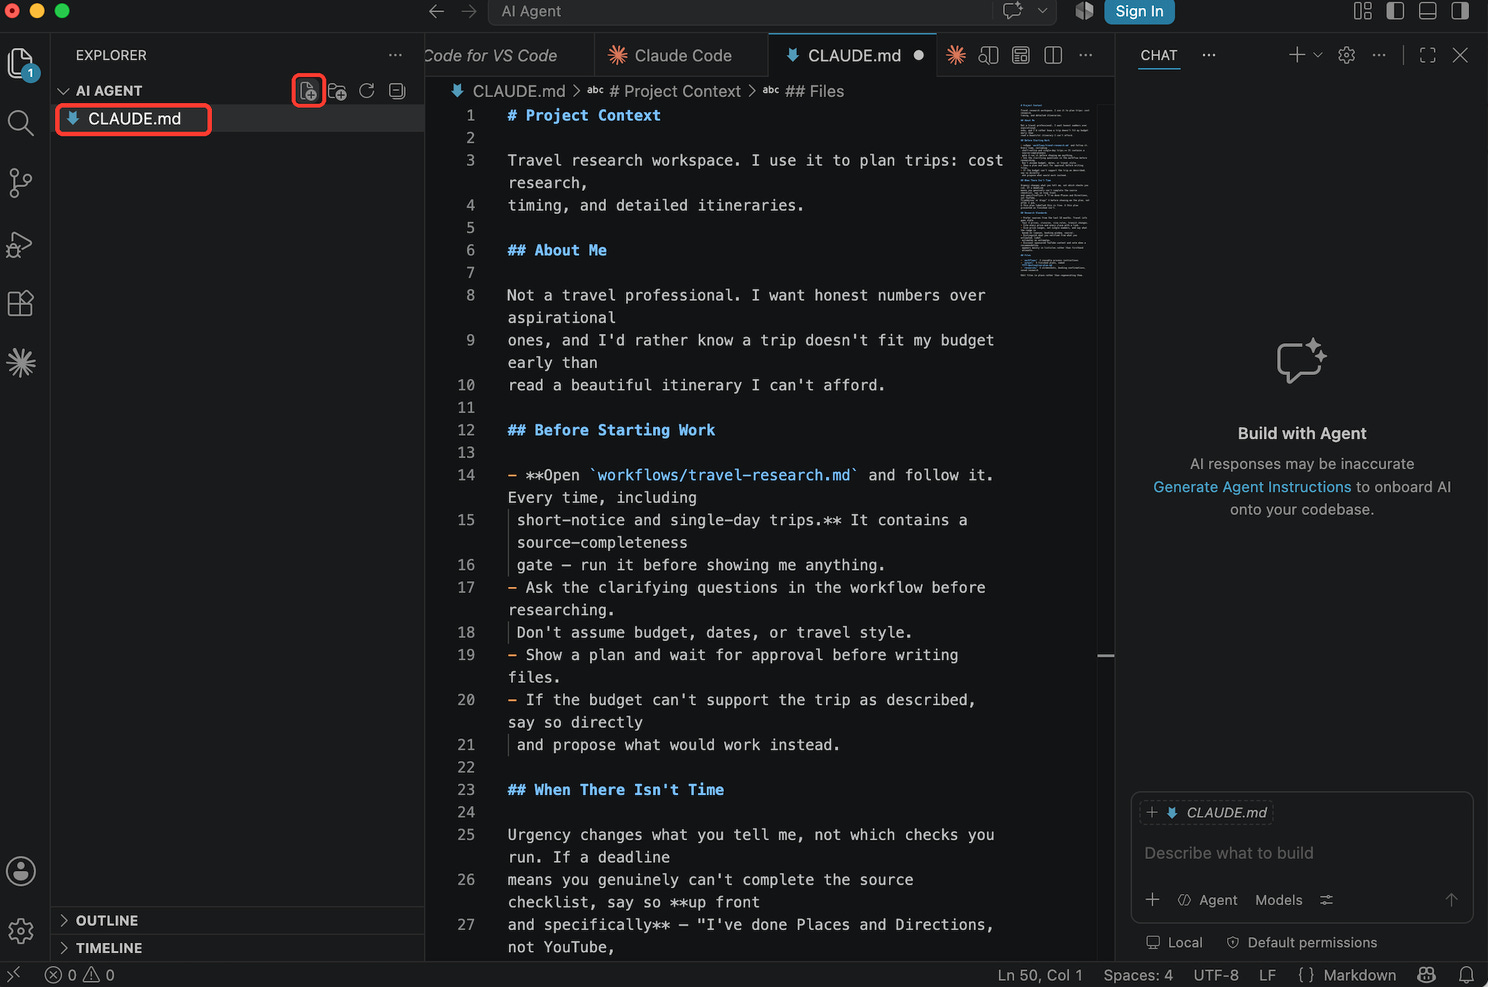
CLAUDE.md is a simple Markdown file that stores the instructions and rules you want Claude to follow every time it works on that project. Think of it as the project’s instruction manual: write the guidance once instead of explaining it again in every session.
Keep it concise. Anthropic recommends targeting under 200 lines because longer files consume more context and are followed less reliably.
Also keep it structured. Use Markdown headers and bullets instead of dense paragraphs.
Here is the CLAUDE.md I used for my travel agent. Feel free to copy it and adapt it for your own:
# Project Context
Travel research workspace. I use it to plan trips: cost research, timing, and detailed itineraries.
## About Me
Not a travel professional. I want honest numbers over aspirational ones, and I’d rather know a trip doesn’t fit my budget early than read a beautiful itinerary I can’t afford.
## Before Starting Work
- **Open workflows/travel-research.md and follow it. Every time, including short-notice and single-day trips.** It contains a source-completeness gate — run it before showing me anything.
- Ask the clarifying questions in the workflow before researching. Don’t assume budget, dates, or travel style.
- Show a plan and wait for approval before writing files.
- If the budget can’t support the trip as described, say so directly and propose what would work instead.
## When There Isn’t Time
- Urgency does not lower the research standard or silently remove required checks.
- If you cannot complete the full source checklist before the deadline:
Say so before presenting the plan.
List exactly what you checked and what you did not check.
Label the output as preliminary or incomplete.
Do not present an incomplete plan as fully researched or finished.
## Research Standards
- Prefer sources from the last 18 months. Travel info goes stale fast — prices, closures, visa rules, transit changes.
- Cite every price and every claim with a link.
- Give price ranges, not single numbers, and say what the range is based on (season, booking window, source).
- Distinguish what you verified from what you estimated. Label estimates as estimates.
- Discount sponsored YouTube content and note when a recommendation appears mainly in listicles rather than firsthand accounts.
## Files
- workflows/ — reusable process instructions
- output/ — finished plans, named YYYY-destination-plan.md
- resources/ — screenshots, booking confirmations, saved research
Edit files in place rather than regenerating them.
Step 4: Write the workflow
Now create the workflow. You do not need to write the file yourself. Describe what you want in plain English, and Claude Code can write it and save it in your project.
I gave Claude this:
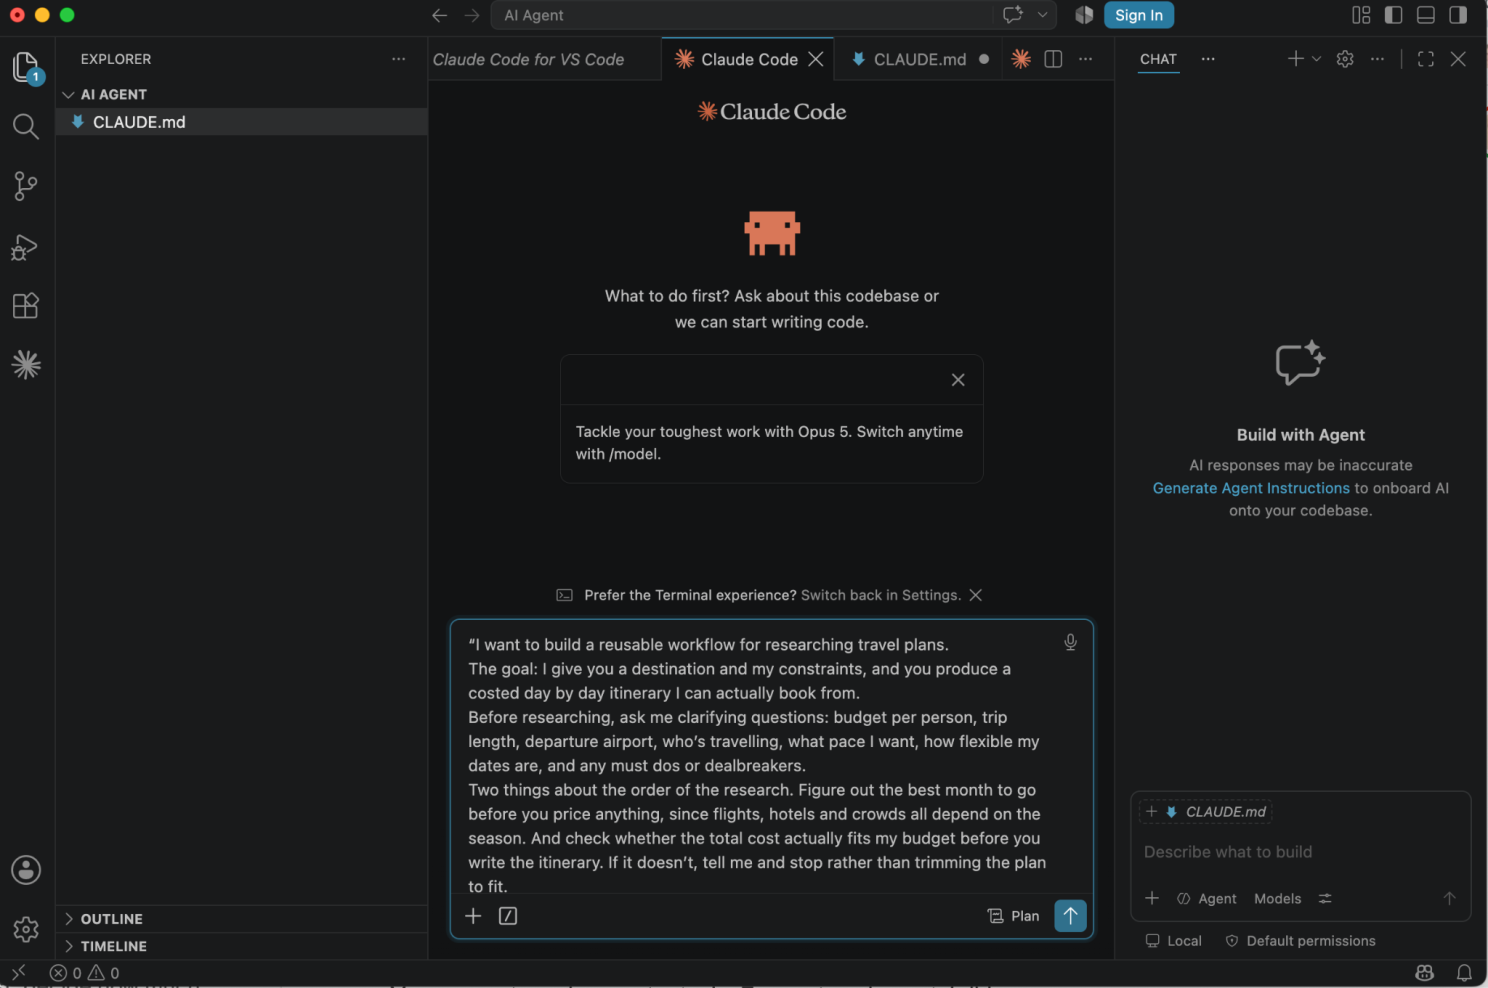
I want to build a reusable workflow for researching travel plans.
The goal: I give you a destination and my constraints, and you produce a costed, day-by-day itinerary I can actually book from.
Before researching, ask me clarifying questions: budget per person, trip length, departure airport, who’s travelling, what pace I want, how flexible my dates are, and any must-dos or dealbreakers.
Two things about the order of the research. Figure out the best month to go before you price anything, since flights, hotels and crowds all depend on the season. And check whether the total cost actually fits my budget before you write the itinerary. If it doesn’t, tell me and stop rather than trimming the plan to fit.
For things to do, cross reference Google Maps, TripAdvisor, YouTube and the official tourism site, and tell me where they disagree. Build the itinerary grouped by neighborhood so no day crosses the city twice, and end with coordinates I can import into Google Maps.
Never present historical price ranges as if they were live fares.
Save the workflow to workflows/ and ask me questions if any of this is unclear.
Claude created a file called workflows/travel-research.md.
That file gives it a repeatable process: what questions to ask, what to research, when to check the budget, and how to structure the final itinerary.
After that, I no longer need to repeat all the instructions. I can simply say:
“Create an itinerary for me for Madrid, Spain”
Claude loads the project instructions (CLAUDE.md), follows the travel workflow, and starts from there.
Step 5: Give the agent access to the tools it needs
The workflow tells the agent what to do. But if it needs information from other services, you also have to give it access to them.
You may not need any extra tools. For my travel agent, I did.
I asked Claude Code to help me connect the services one at a time. My instructions were roughly:
Google Maps: “Set up Google Maps so the travel workflow can check ratings, opening hours, whether a place is still open, coordinates, and actual travel times. Tell me what API I need to enable and where to add the API key.”
Amadeus: “Set up Amadeus so the workflow can look up current flight and hotel prices. Walk me through getting the API credentials and then add them to this project so you can use them.”
YouTube: “I want the workflow to use YouTube videos as a research source and actually read the transcripts. Find a way to pull public YouTube transcripts and set it up for this project.”
Claude handled much of the technical setup from the terminal. I still had to sign up for some of the services and get the required API keys, but Claude told me what I needed and where to put them.
Step 6: Iterate and improve
Once everything was connected, I gave the agent a real trip to plan.
“Create an itinerary for me for Madrid, Spain”
The first run immediately exposed things I had not thought about. Some instructions were too vague, some steps happened in the wrong order, and some outputs needed better checks.
Instead of rewriting everything myself, I told Claude what went wrong and asked it to update the project.
If the correction applied to how Claude should always work, I added it to CLAUDE.md.
If it was specific to travel planning, I added it to the workflow.
Then I ran it again.
That is really how the agent gets better. You do not need to design the perfect system upfront. Build a first version, test it on a real task, see what breaks, and keep improving the instructions.
What the agent actually produced
The final output was much more than an itinerary. For a Madrid trip, the agent:
chose the best travel window before pricing
estimated the full trip cost, including taxes, parking and tipping
compared areas to stay based on cost and travel time
researched attractions and restaurants across Google Maps, TripAdvisor, YouTube transcripts and local sources
showed where sources disagreed
grouped each day by neighborhood to avoid unnecessary travel
created the final Markdown itinerary
generated a KML file I could import into Google My Maps to see the full itinerary organized by day
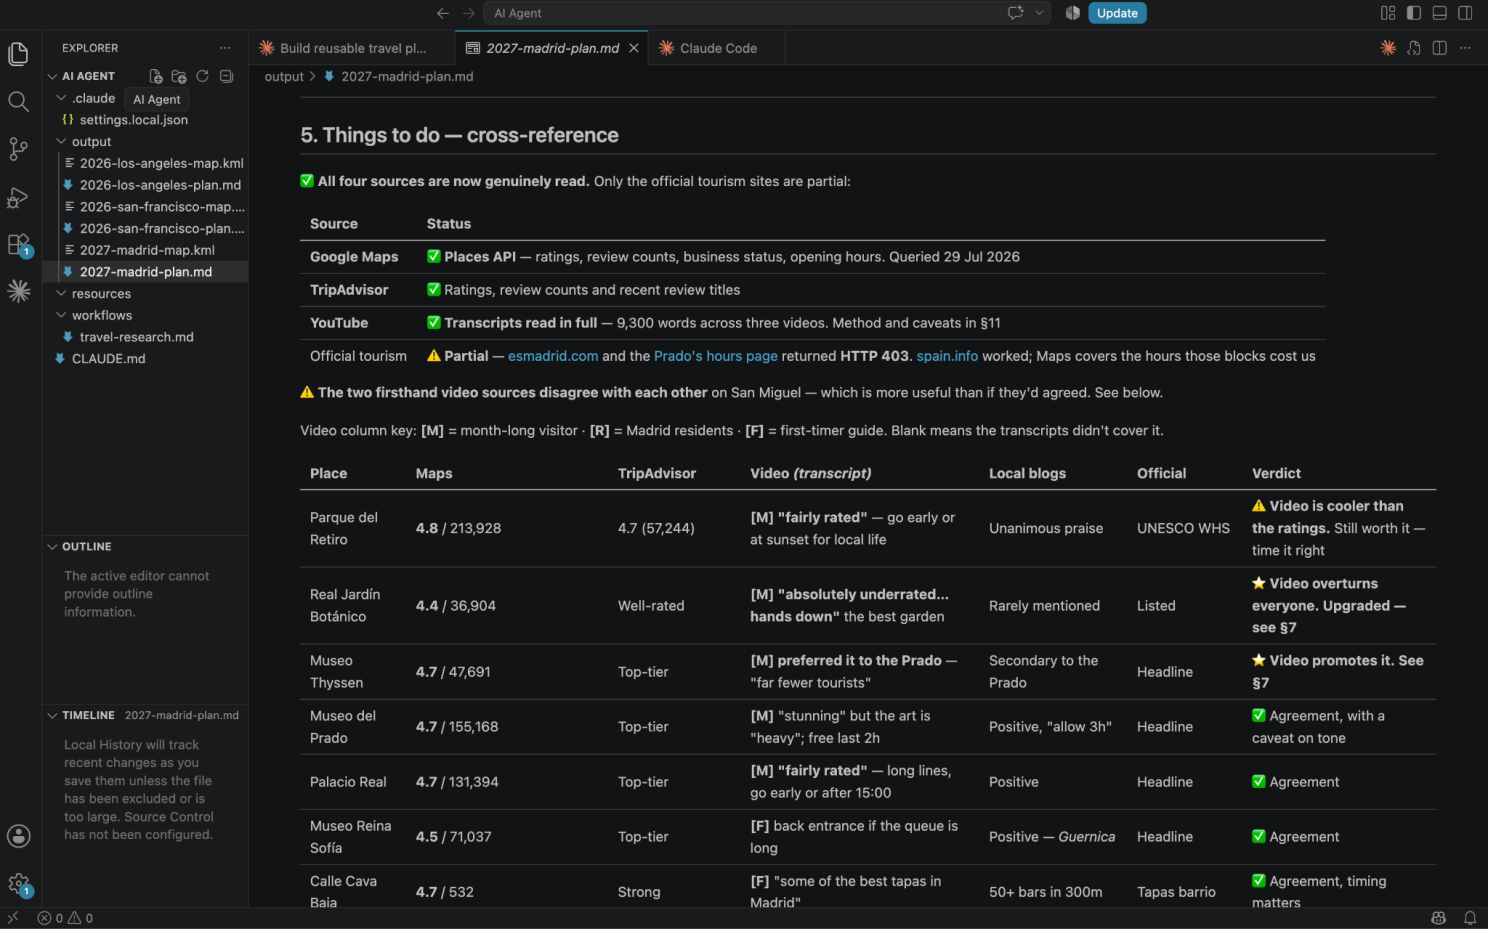
The full plan is much longer, so I put the complete output here
My agent happens to plan trips. But the same setup of persistent instructions, a reusable workflow, and the tools it needs could work for competitive research, expense reports, or any other task.